
Figuring out how to change blade on Ryobi Table Saw is a relatively simple task that can be completed in a few steps. First, make sure the saw is unplugged, and the blade has stopped moving. Then, remove the blade guard by pulling it towards you. Locate the blade lock knob on the front of the saw and loosen it. Insert the new blade into the saw, making sure it is securely in place, and tighten the blade lock knob to secure the new blade in place. Reinstall the blade guard and plug the saw back in.
And voila! You’re done. But, of course, there are a few important details you probably need to know, so jump in and start reading.
Note: If you’re interested, check out our guide on how to change the DeWalt table saw fence.
Step 1: Know Why The Blade Requires Changing.
There are a few situations where a table saw blade change might be necessary.
- The blade must be replaced if it is damaged.
- The blade must be sharpened or changed if it is dull.
- Additionally, you might need to switch to a different kind of blade if you are changing the type of cuts you are making.
- You’ll need to switch out blades if you’re altering the size or number of teeth on the blade for your project.
To ensure that your table saw blade lasts for a longer time and doesn’t need frequent changes, follow these 4 Easy Steps on How To Clean A Table Saw Blade.
Step 2: Collect The Tools You Need
You’ll need a few tools to assist you when replacing the blade on your saw. Here is a list of the most necessary ones:
- You’ll need to remove and reinstall the table saw blade cover with the use of a Philips screwdriver.
- To tighten the nut on the new table saw blade and help tighten the nut on the old blade, you will need to use an Allen wrench or hex wrench.
- A little piece of wood is required to hold the blade in place while you remove it to add a little extra safety. Although absolutely optional, doing this is strongly advised.
- In order to replace the old table saw blade, you will also need a new one.
Step 3: Safety First
When changing a table saw blade, always use safety goggles and gloves.
Moreover, before doing any work on the machine, it is best to unplug it from the power source. If you ignore doing so, an accident could occur.
The power switch for the Ryobi table saw is a red button. You can, therefore, easily find and press the power button to ensure your safety.
Another important element for safety is knowing to work with the right height since it changes how you use the saw in the first place. Learn more about how high a table saw should be before you continue.
Step 4: Remove the Ryobi table saw blade guard
Locate the red table saw blade guard that is used as protection. There are two screws located on the red blade guard. You must first remove the screws with the use of a screwdriver.
It is advised that you unscrew them with a Philips screwdriver. In order to prevent them from falling into the blade storage area, you need to remove these screws in a safe, stable area. If you do not, getting them back will be extremely challenging.
As a result, after unscrewing it, take off the red blade guard. Keep it in a secure location since you will need it again when replacing it with the new blade.

Step 5: Use the lever to raise the table saw
Directly beneath the tables, there is a lever. To lift the table saw, you should continuously turn the lever. Use an open-end wrench to hold the blade-inserted shaft, also known as an arbor, once you have reached the highest position. An arbor nut can be found at the end of this arbor.
To remove the nut, use the wrench. You should use caution because the table saw blade is very sharp. If you slip unintentionally, the razor’s edge could severely hurt you.
You can protect your hands by donning thick hand gloves to avoid any unwanted consequences.
Step 6: Use your fingers to unscrew the nut
Once the nut is moving freely, you can be sure that it has been loosened. Now, thoroughly unscrew the nut using your fingers. This is more practical and often less time-consuming because of the precision of your fingers.
Next, take the washer out. Be careful not to drop the arbor nut or the washer when removing them. If they slip into the saw’s storage compartment, you’ll need to buy new ones.
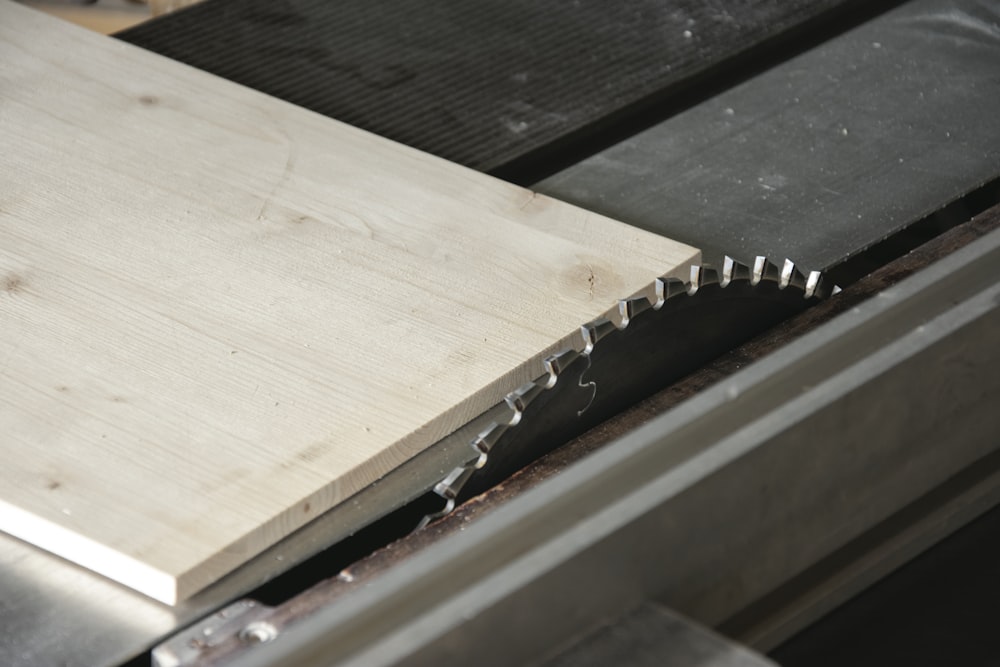
Step 7: Take the blade out
The table saw blade can now be taken out with ease. Remember that the blade is pointed, so you might want to use caution there. Gently remove the blade.

Step 8: Install the new blade
You can now install the new table saw blade after successfully removing the old one.
For properly adjusting the blade, there is a tip. The blade’s top, or the side with the inscription, should be facing outward.
Install the blade with the teeth facing you in order to better grasp this advice. There is a circular pattern to the saw. When you feed things through it, it spins in your direction. It can also be said that the blade spins counterclockwise, as well.
Step 9: Fix the washer
Fix the washer on the arbor after the new blade has been installed. If you keep in mind how you took it apart, it’ll be easy to put it together again.
Step 10: Use your fingers to tighten the arbor nut
Using your fingers, tighten the arbor nut. Make sure the screw fits tightly, even if you can’t completely fix it in place with your fingers.
Step 11: Use the wrench to tighten the arbor nut
After tightening the arbor nut as much as you can with your fingers, use the wrench to complete the task. Remember that you must exercise caution due to the blade’s sharpness.
Step 12: Bring the blade down
Use the lever on the side of your saw table to lower the table saw blade after tightening the arbor nut. Allow it to sink to the lowest level.
Step 13: Use the guard to protect the blade
Put the blade guard in the appropriate location. To secure the two screws on the blade guard, tighten them using your Philips screwdriver. You can now begin using the new blade for cutting with your Ryobi table saw.
Of course, if there are any other issues, you might want to confirm whether the blade alignment is correct. For that, we recommend learning how to align the table saw blade.
Advice for Maintaining Ryobi Table Saw
The reliability of your Ryobi table saw will depend on the type of work you do and how frequently you use it. You can apply the advice in this article to increase its longevity and use.
- Clean your saw both before and after each project you use it for. When you sand or cut, put on a mask, and be sure to use a moist cloth to wipe off sawdust as it gathers on the table to increase its lifespan.
- Always use sharp blades. A dull blade is more likely to break, you could suffer significant injuries, and your table saw could sustain damage. A dull blade should be changed or replaced according to the directions in your owner’s manual (or the tips outlined in this article!).
- When not in use, store your table saw safely in a dry location away from the reach of children and pets.
- Use a push stick. To prevent kickback when operating your table saw, push the lumber through the saw with a specialized push stick.
- Don’t stand too close. When your table saw is operating, be sure to stand far enough away so that you don’t run the chance of bumping into the blade or suffering harm.
Of course, if you require advice, such as a practical demonstration, do check out the process of changing a Ryobi Table Saw Blade with this video because it outlines the steps you need to follow as well, and if you want to use it alongside the guide we’ve given you, then all the better!
Things to consider when learning how to change blade on Ryobi Table Saw :
Ryobi table saw blades come in a wide variety of styles, each suited for a distinct job. The biggest choice is whether to replace the blade on your old Ryobi table saw with a similar model or upgrade to a better-performing model.
Working with wood raises certain safety issues as well, particularly if you are unfamiliar with the necessary instruments. Always ensure sure the machine’s power supply is turned off before working on it because there might be some residual current still flowing through the equipment that could otherwise cause harm.
After changing the table saw blade, other adjustments can be required, such as modifying the angle of attack and cutting depth. Even recalibrating your table saw may be necessary after changing a blade.
FAQs
When should I think about how to change Ryobi Table Saw Blade?
When your blade starts to become dull, it is a good idea to replace it. The saw may bind due to a dull blade, which is hazardous.
One way to tell whether your blade is getting dull is by the quality of your cuts. It’s time to change the blades if they aren’t as precise or clean as they once were.
The time it takes you to make a cut is another clue. It can be getting dull if it’s taking longer than usual.
What is the ideal method for storing a table saw?
Your table saw should be kept dry and free of dust while not in use. For better organization, wrap the cord around the saw. To keep your saw off the ground and safe, it’s also a good idea to use a table saw stand.
The Bottom Line
Wasn’t that easy? We aimed to explain the procedure of how to change blade on Ryobi Table Saw simply, and, therefore, sincerely hope that our instructions on how to change the blade on a Ryobi table saw will help you to do so.
Although the technique is a little challenging due to the blade’s sharpness, if you follow the simple tips we provided in this post and take the right safety precautions, you can easily replace the blade on your Ryobi table saw! And you can also try learning more about the Ryobi Blade to circumvent the issue.
On the other hand, if you’ve got a Ridgid table saw instead, learn How To Change Blade On Ridgid Table Saw.
Related posts:
 The Ultimate Guide on How to Adjust a Table Saw
 A How-To Guide: How To Change Blade On Ridgid Table Saw
 How To Change Table Saw Blade Without Wrench?
 How To Assemble Ryobi Table Saw – A Step-by-Step Guide
 How To Install A Blade Guard On Craftsman Table Saw? A Quick Guide
 How To Install Blade Guard On The Ryobi Table Saw?
 A Quick Guide On How To Align Table Saw Blade!
 How Does a Table Saw Work? A Quick Guide